By: Team Modulo Since: Feb 2020 Licence: MIT
- 1. Introduction
- 2. Quick Start
- 3. Tutorial
- 4. Features
- 4.1. Viewing help :
help - 4.2. Adding a module:
module(Multistep) - 4.3. Adding an event:
event - 4.4. Adding a deadline:
deadline - 4.5. Listing events or modules on the left:
list - 4.6. Viewing module or event details:
view - 4.7. Finishing a deadline:
done - 4.8. Finding events or modules using keywords:
find - 4.9. Deleting a module/event/deadline:
delete - 4.10. Exporting Events and Deadlines:
export - 4.11. Clearing all data:
clear - 4.12. Editing added Events and Deadlines:
[coming in v2.0] - 4.13. Importing a NUSMods Calendar:
[coming in v2.0]
- 4.1. Viewing help :
- 5. UI
- 6. FAQ
- 7. Appendix
1. Introduction
Modulo is for NUS students who prefer to use a desktop app for managing their school work on a modular level.
It helps you to break down your modules into deadlines and track their progress.
Currently Modulo is made for NUS students taking modules this Academic Year AY2019/2020 Semester 2! More importantly, Modulo is optimized for those who prefer to work with a Command Line Interface (CLI) while still having the benefits of a Graphical User Interface (GUI). If you can type fast, Modulo can get your module management tasks done faster than traditional GUI apps. Interested? Jump to Section 2, “Quick Start” to get started. Enjoy!
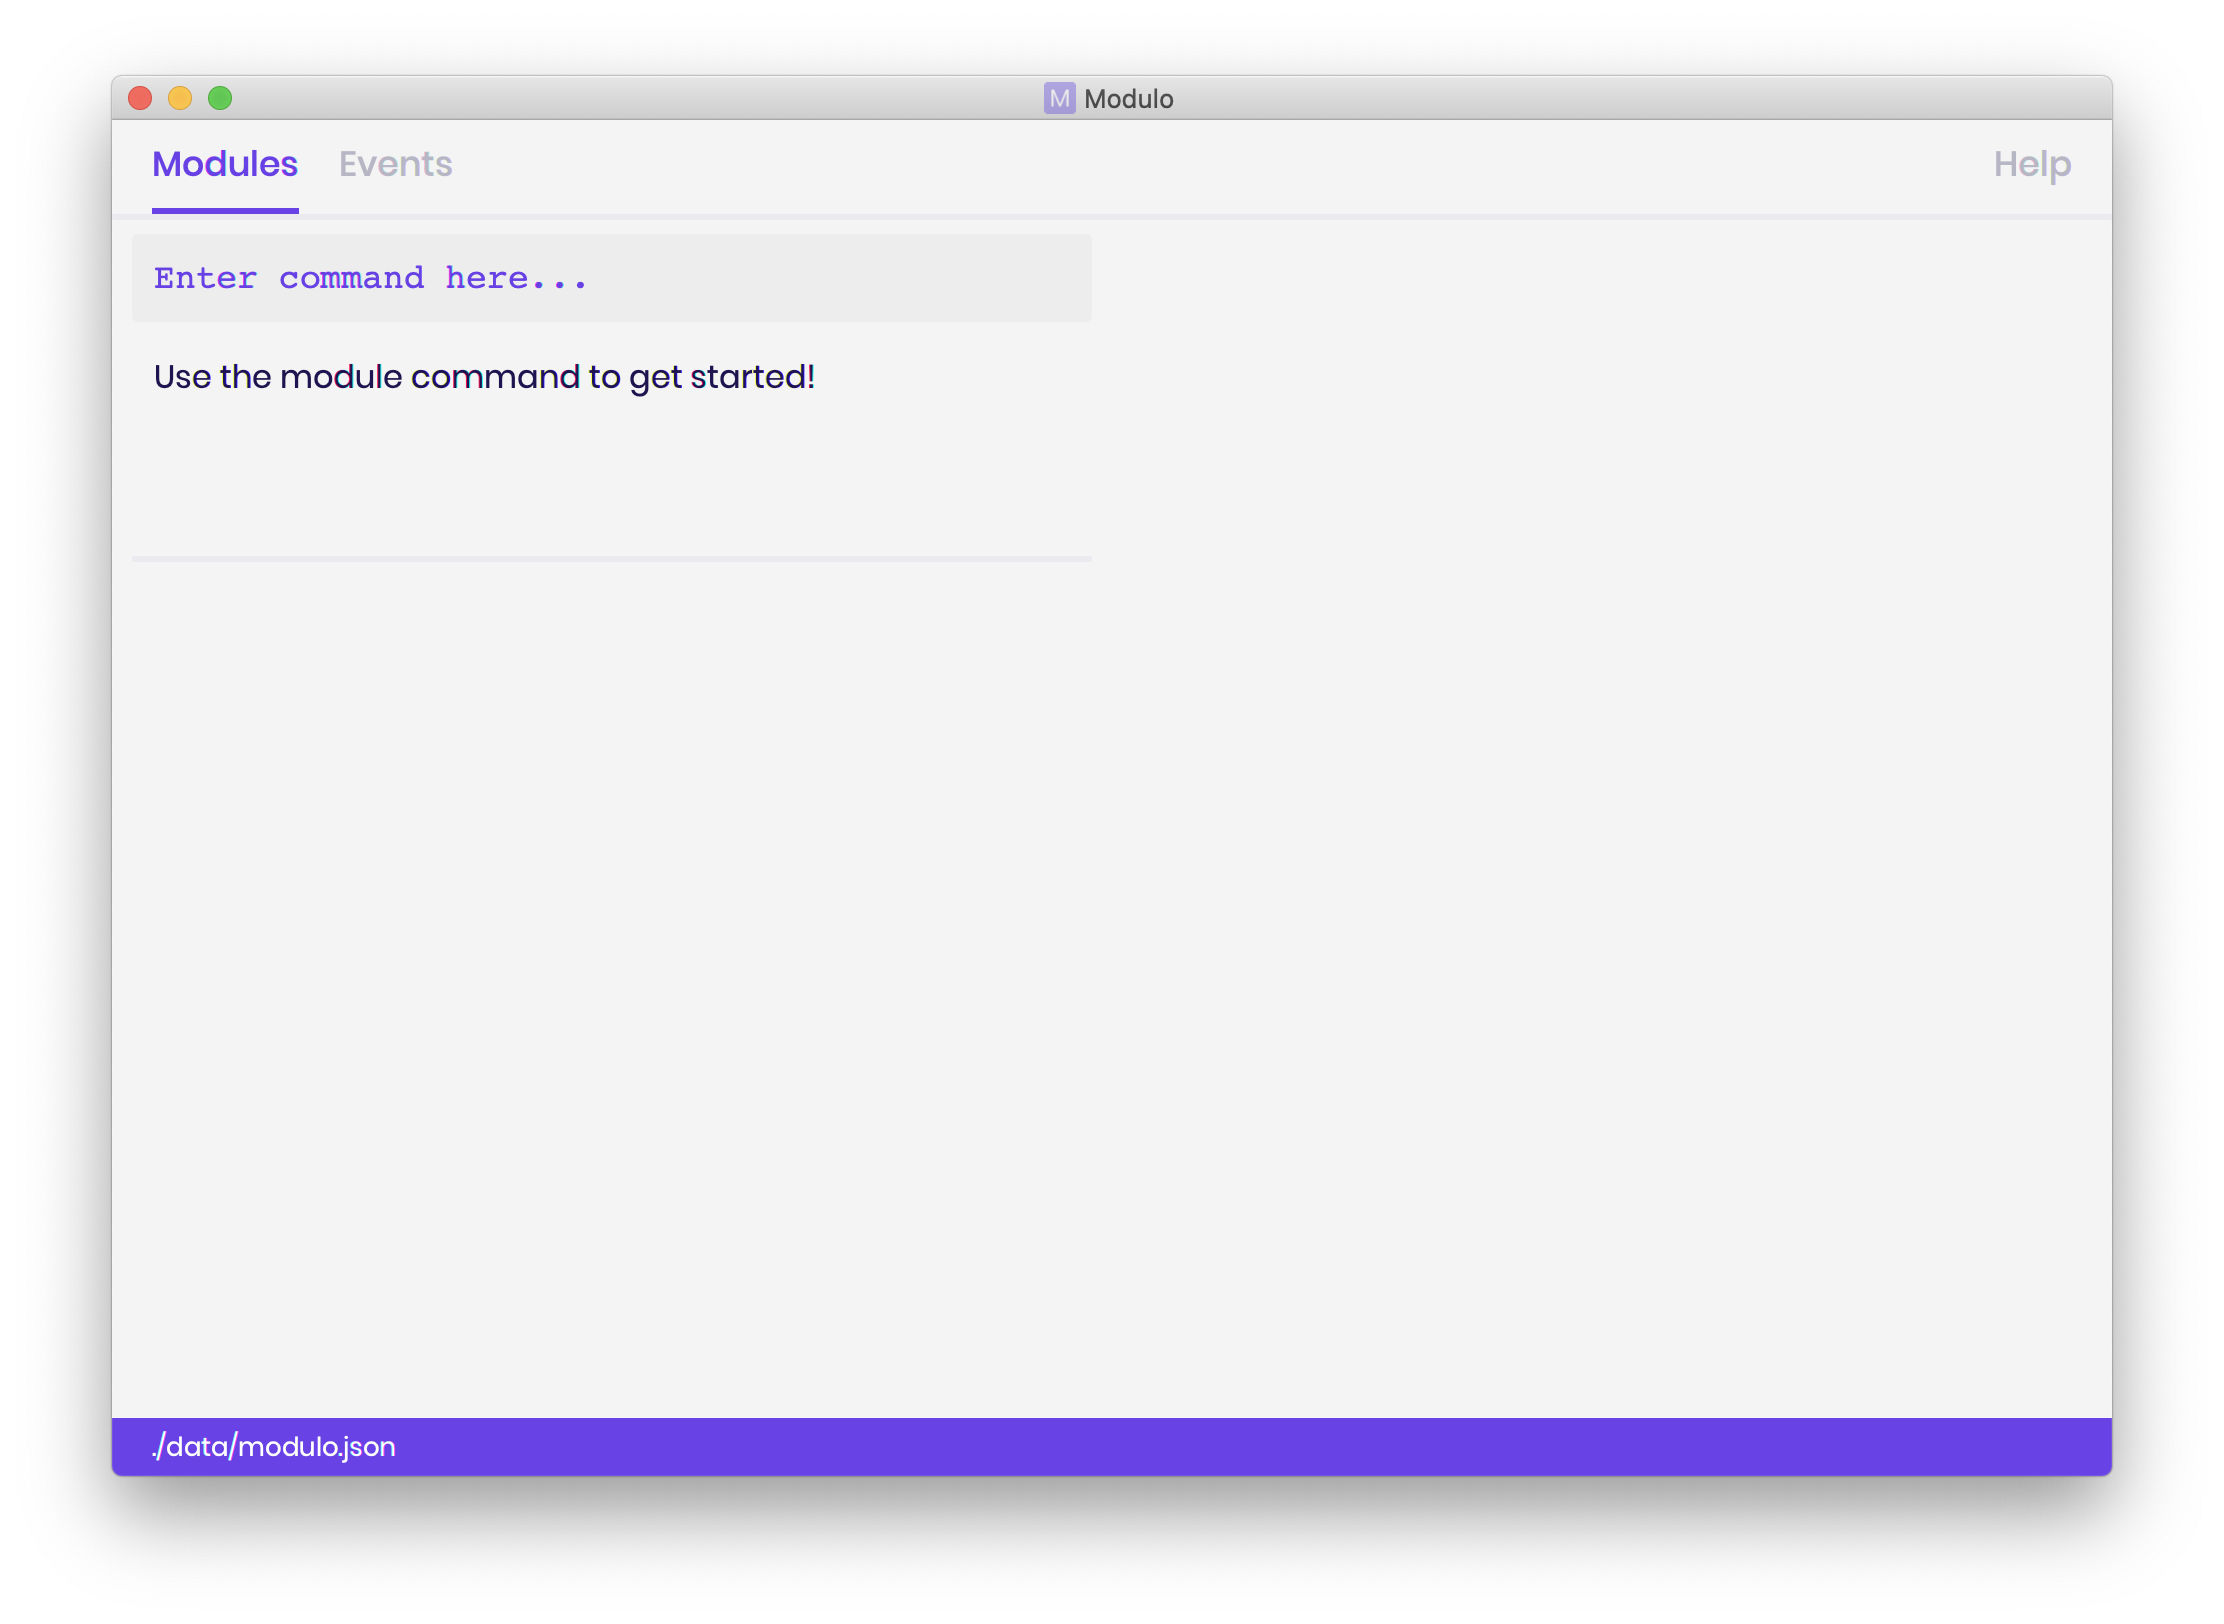
2. Quick Start
-
Ensure you have Java
11or above installed in your Computer. -
Download the latest
modulo.jarhere. -
Copy the file to the folder you want to use as the home folder for Modulo.
-
Double-click the file to start the app. The GUI should appear in a few seconds. Don’t worry if it’s empty! We’ll be getting it populated in a matter of minutes in Section 3, “Tutorial”.
-
Type the command in the command box and press Enter to execute it.
e.g. typinghelpand pressing Enter will open the help window. -
Refer to Section 3, “Tutorial” for a quick tutorial to Modulo!
-
Used Modulo before? Refer to Section 4, “Features” for details of each command. Note: We highly recommend going through the tutorial before starting!
3. Tutorial
Isn’t the empty application just ugly? Let us get your modules into the app in just a matter of minutes!
3.1. Multistep Commands
Wait… Multistep?
We understand that many may be used to instant, one-step commands when using CLI apps.
Here at Modulo, we strongly believe in smooth and seamless user experiences.
Why type the same thing twice when you can do it once, or even never? Modulo builds onto what you’ve already entered, to reduce the amount of typing required, and make everything easier for you!
And for the testers out there: No, we don’t believe this reduces testability. In fact, it helps you jump right into testing the exciting stuff!
In Modulo, some commands are multistep commands.
These commands require you to go through all the steps before you can move on to other commands.
You will know you’re in the middle of a multistep command when you see the colour of your command box change:
Warning: Quitting the app in the middle of a multistep command will terminate the command!
Any undone operations will be lost.
If you’re interested to help us with improving Modulo, do take a look at our Developer Guide!
3.2. Adding Our First Module
Our first command, module, is a multistep command!
This command helps you to add a module and all of its related events in one go!
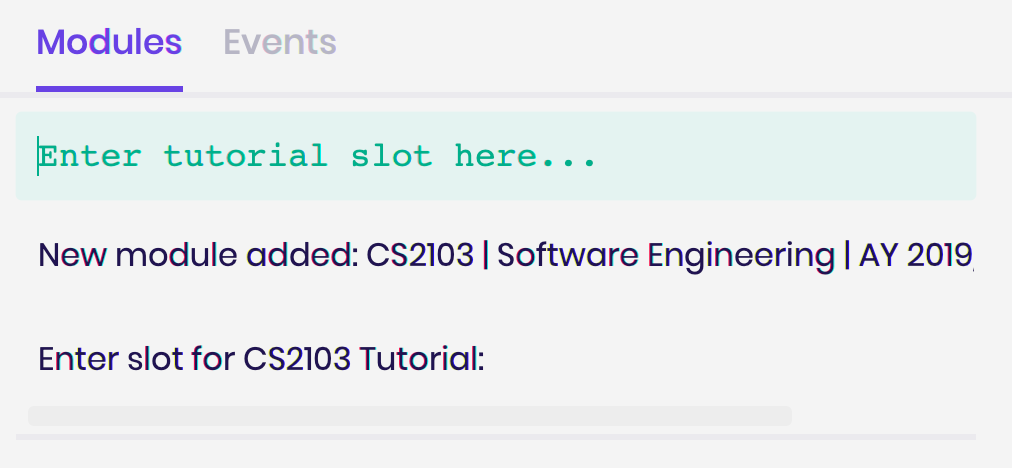
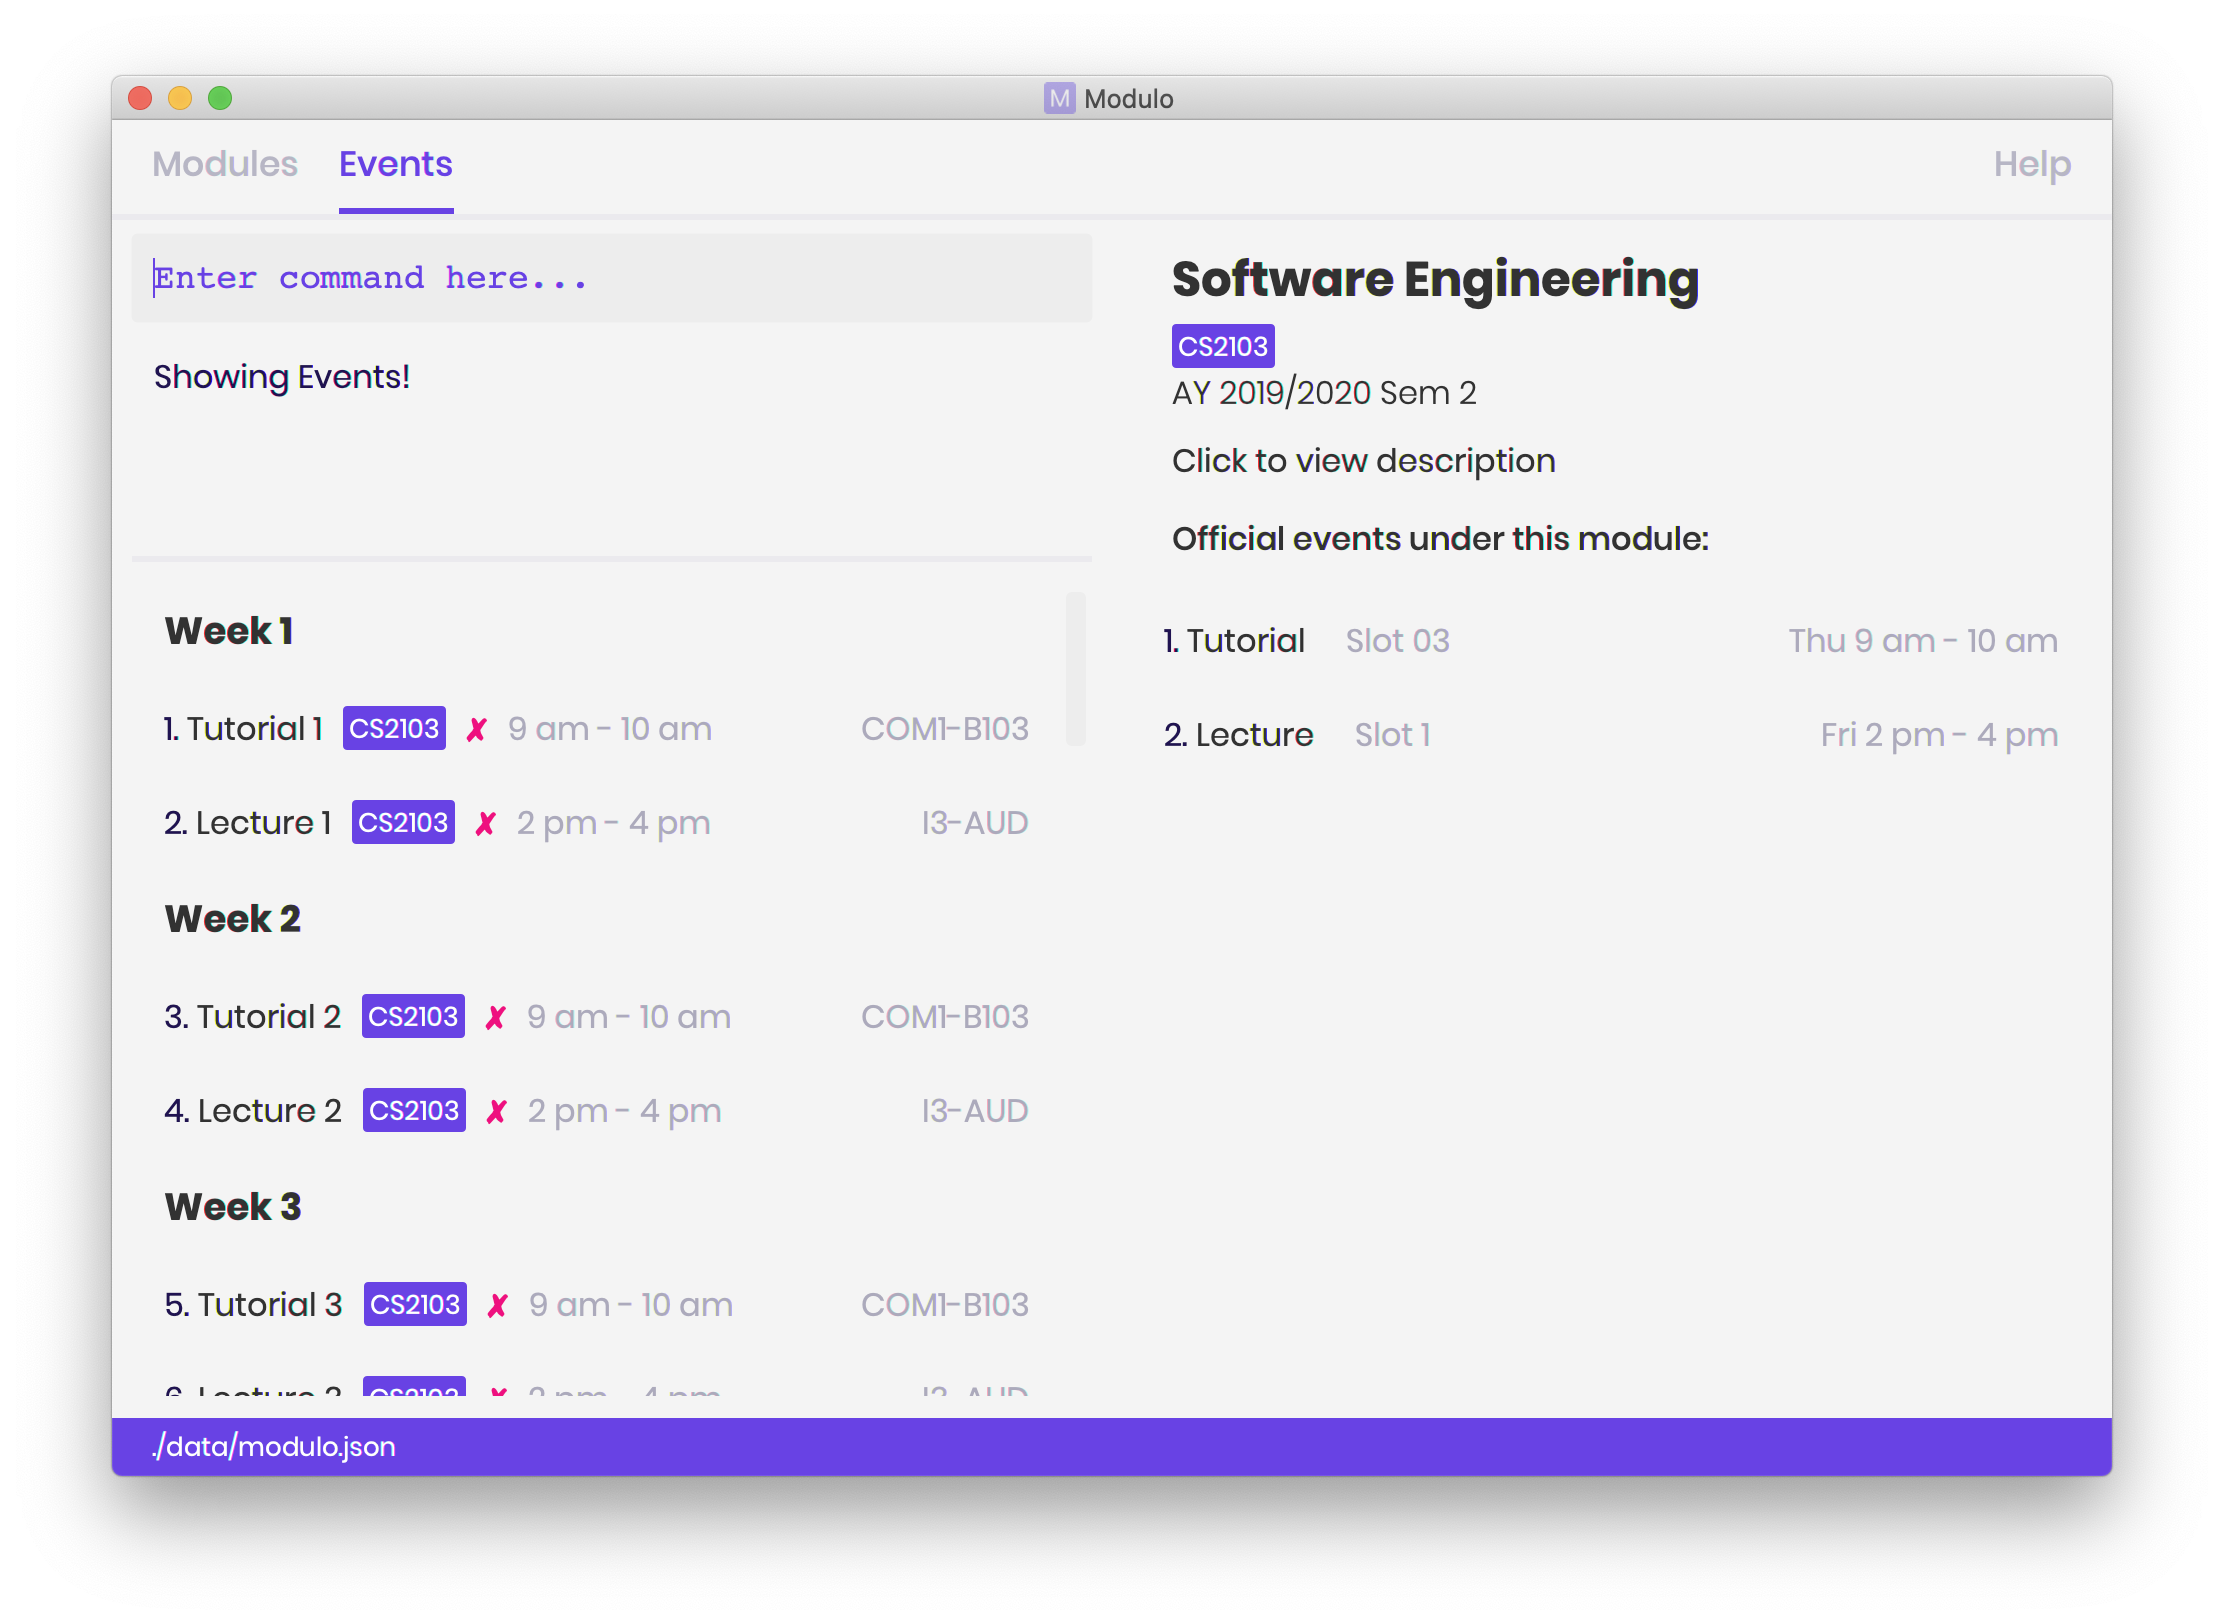
Let us start with module m/cs2103!
This add CS2103 - Software Engineering into our list of modules.
Now you may see the following prompt:
Simply type in your slot and press Enter! For the purposes of this tutorial, we’ll go with slot 3!
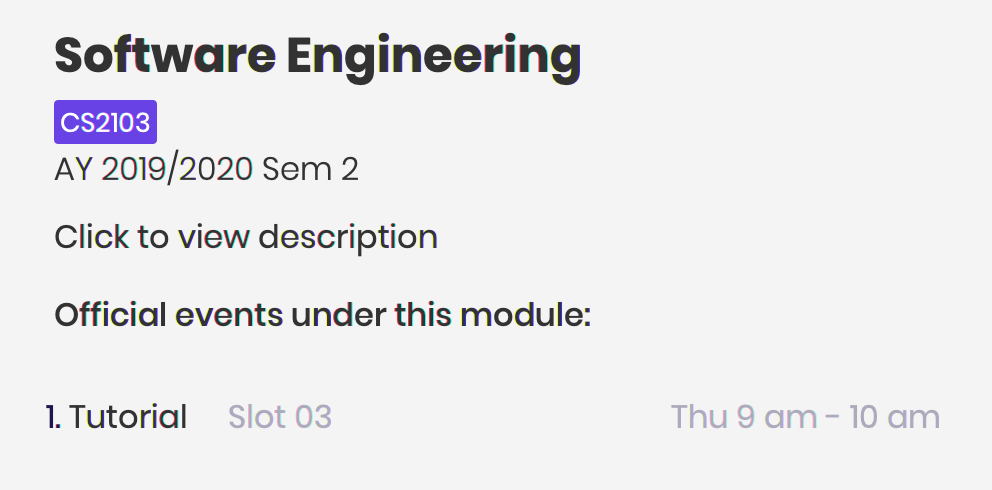
You’ll see two changes. Firstly, the event is added:
Secondly, the command prompt changes:
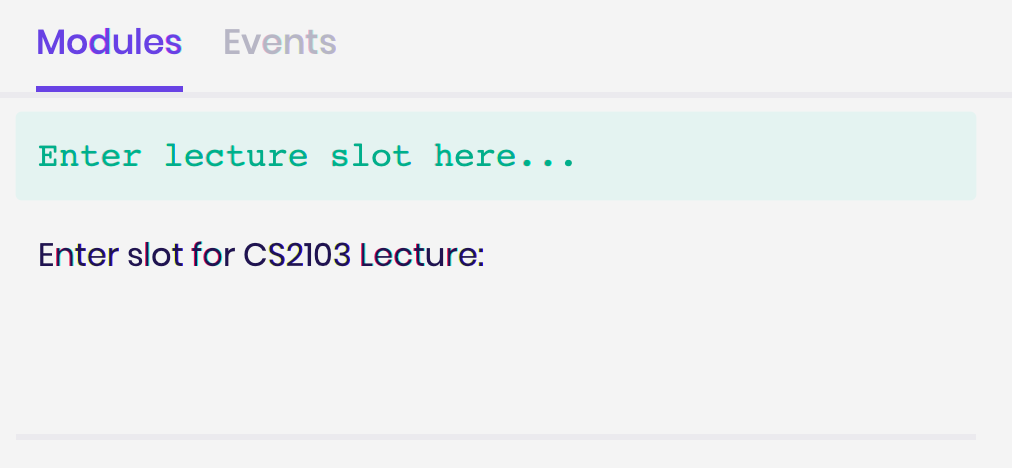
Key in your lecture slot as well. When you see the below message, you know you’re done!
For users who may be taking CS2103T instead, go ahead and add that instead.
You’ll only have your lecture to add, so enter your lecture slot when prompted, e.g. G01.
3.3. Viewing the Events we just added
Now that we’ve added our events, it’s time to start planning!
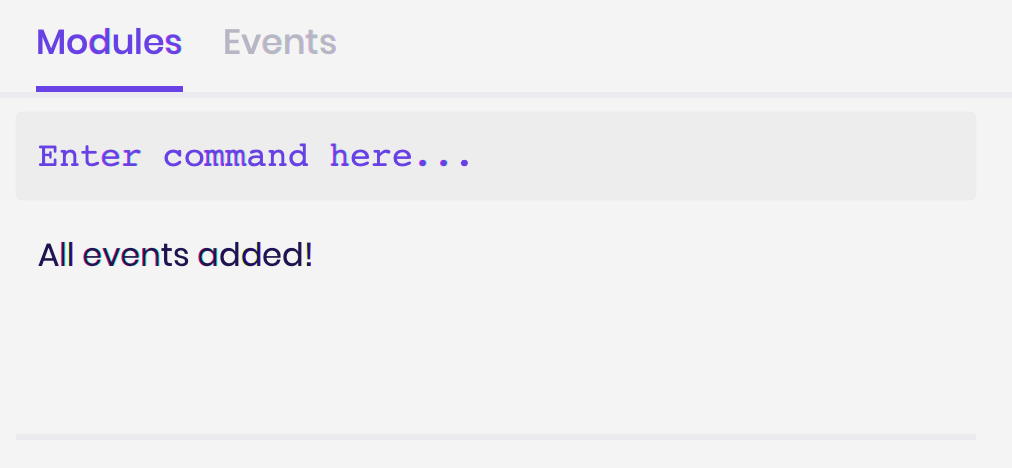
Go ahead to switch to the Event list with the following command: list event.
You’ll see the events that you just added on the left!
Let us try to view the details for Tutorial 2. We just need to type: view 3, where 3 is the index of Tutorial 2!
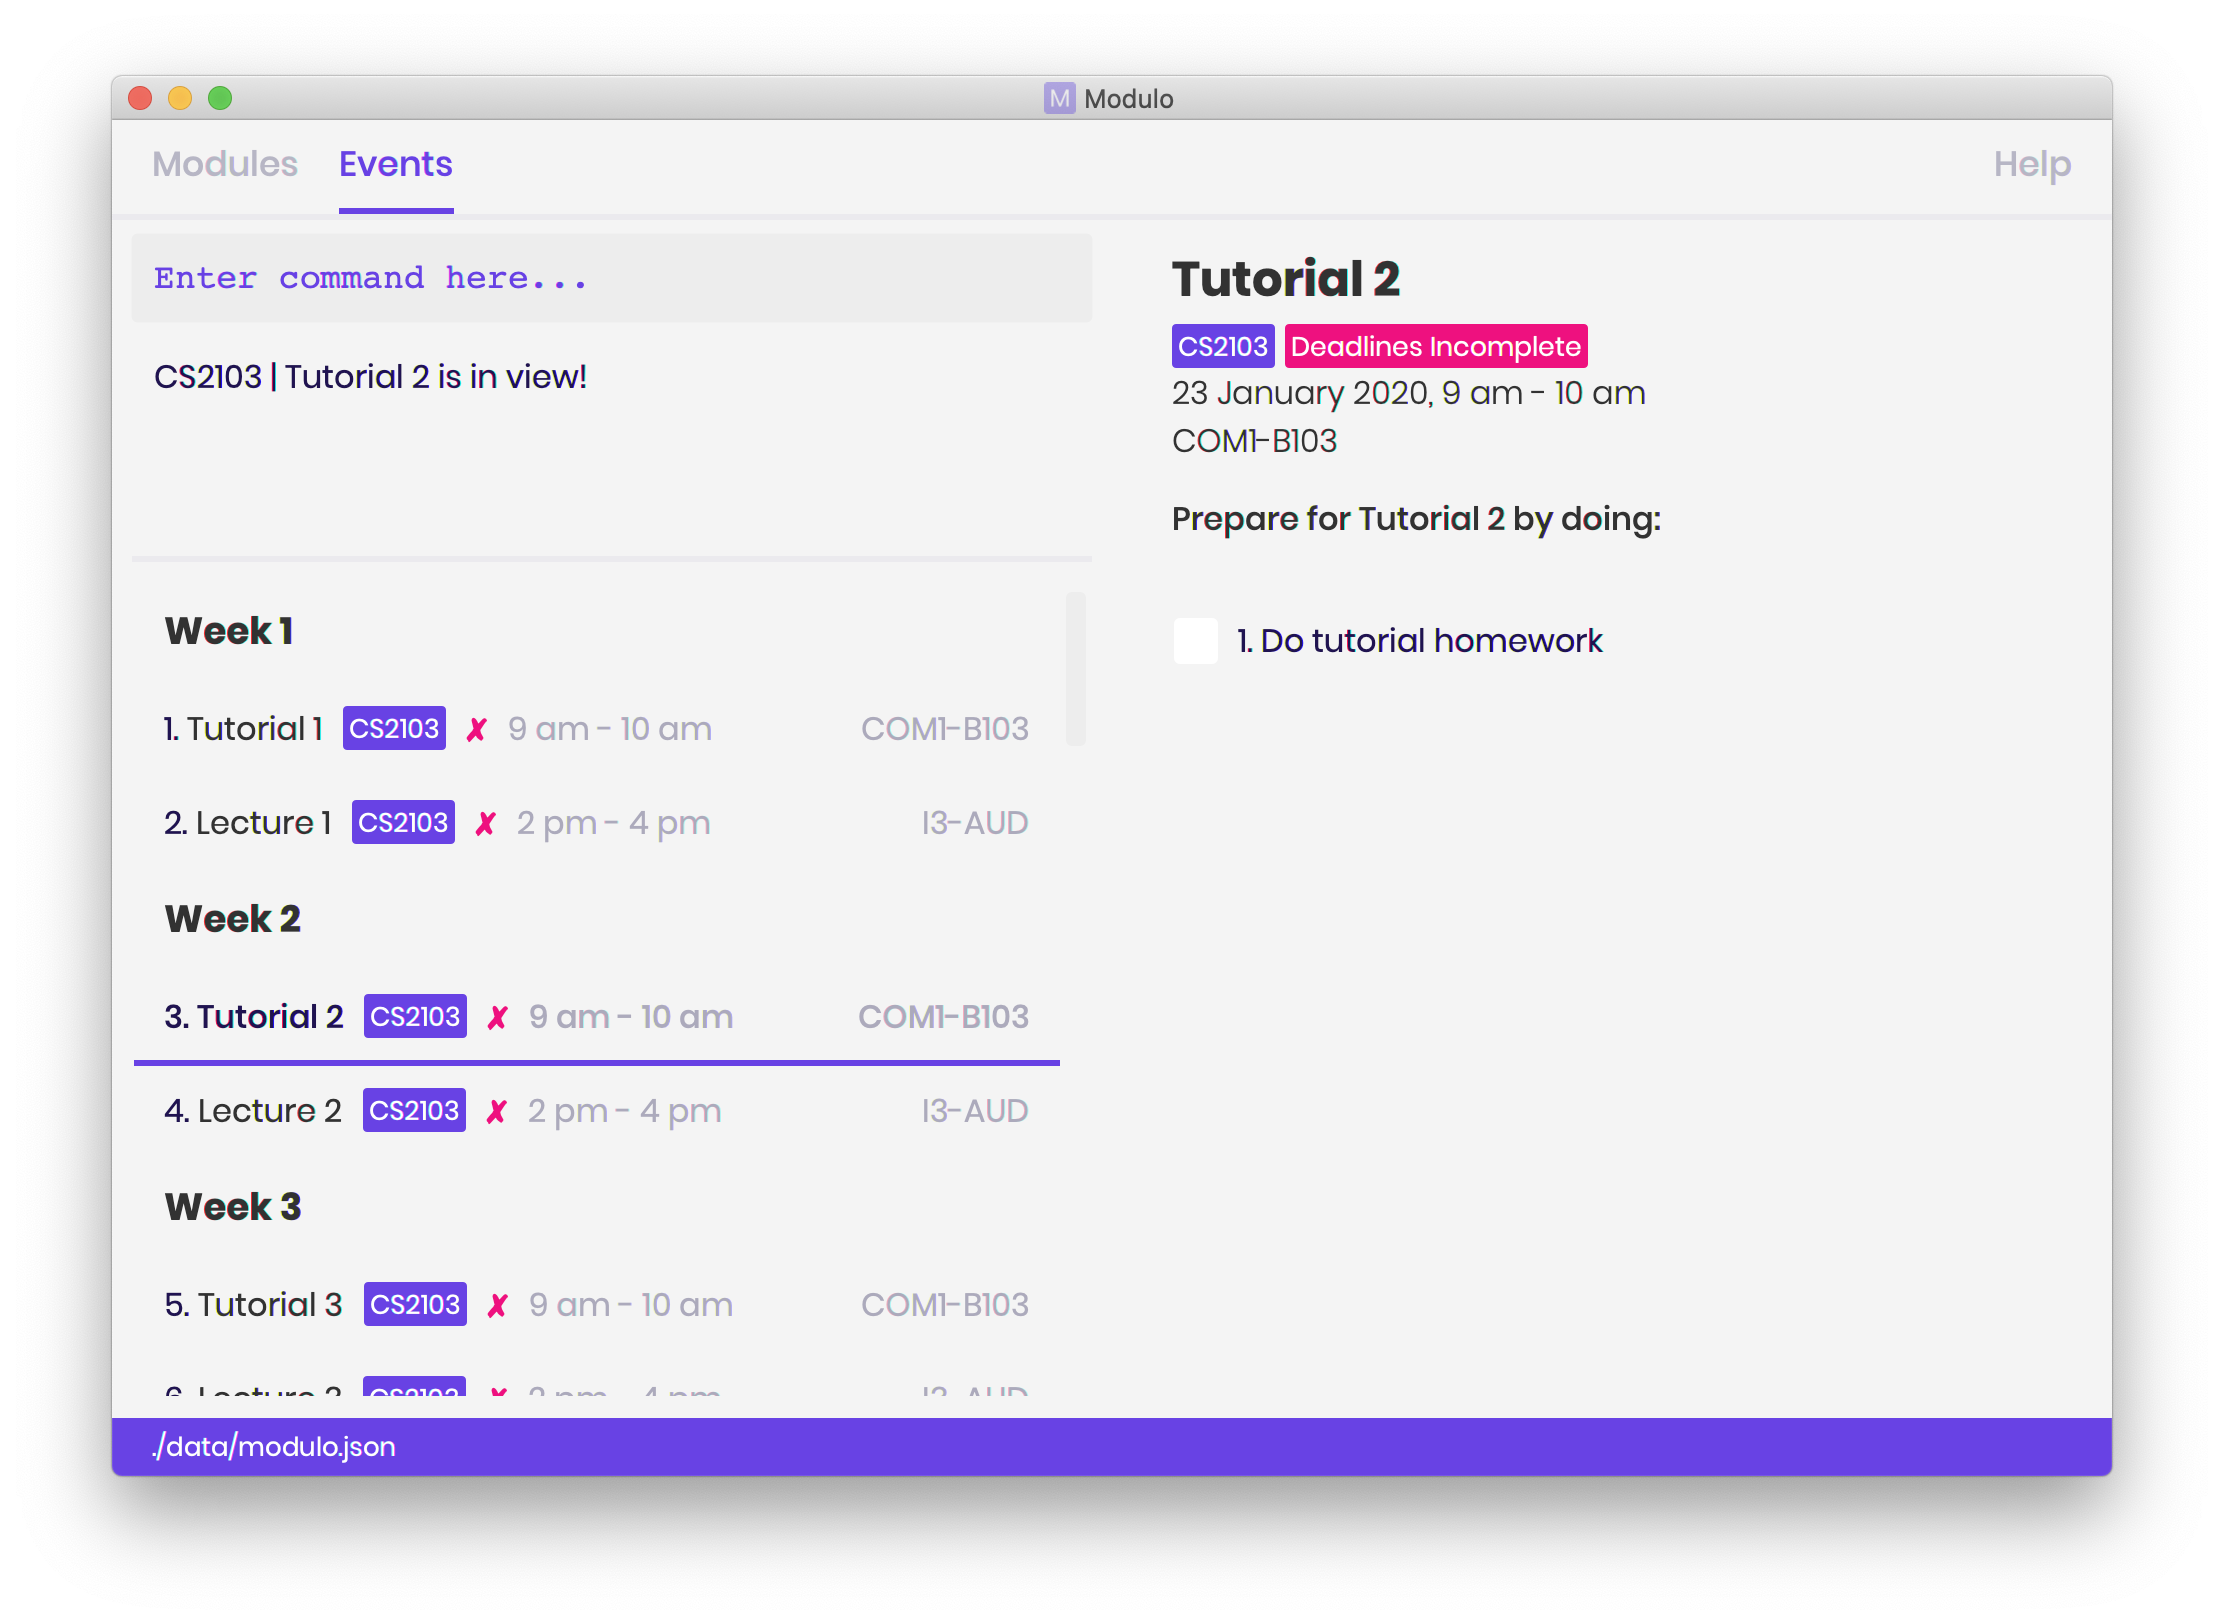
Now we get to see the details of the event on the right!
Tutorial 2 is now the focused event. We call the item that is displayed on the right the focused item. For example, earlier, CS2103 was the focused module.
3.4. Adding our first Deadline
With Tutorial 2 in focus, we can now add deadlines easily to it.
Let’s say we want to practice drawing UML diagrams before the tutorial starts.
We can create a suitable deadline by typing: deadline n/Practice UML Diagrams.
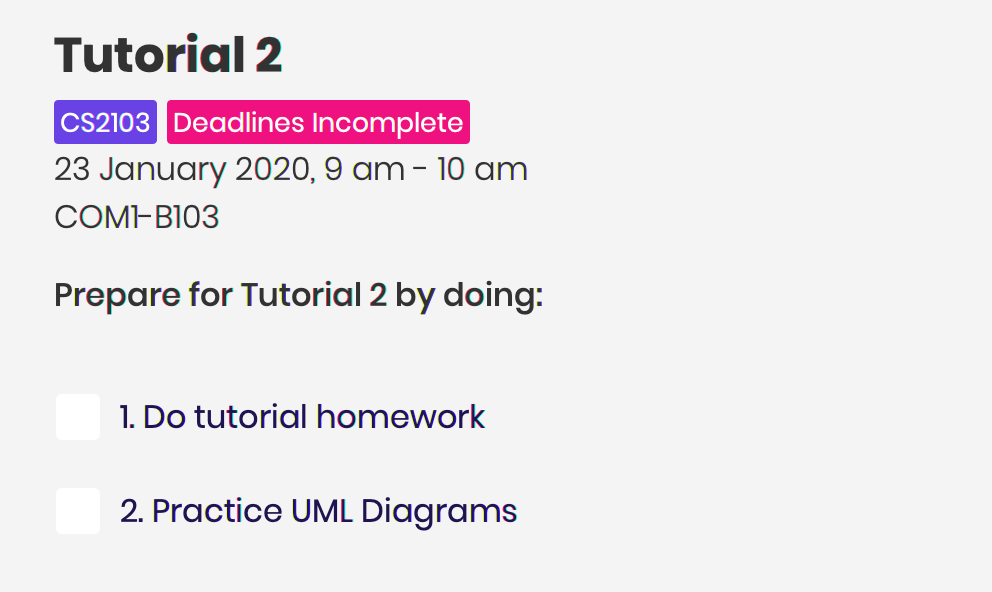
We have now just added the deadline to Tutorial 2, which is the focused event!
3.5. Completing our first Deadline
Hopefully, everyone here is hardworking!
We’re now done with creating a deadline.
How about completing it?
Let us complete the deadline we’ve just added by simply typing: done 2, where 2 is the index of the deadline shown!

And we’re done with the tutorial!
3.6. What next?
Of course, Modulo supports CLI usage, i.e. minimal references to the GUI! For that, our commands have variations that do not depend on the focused item, and commands that reduce the need for scrolling!
Want to find out more? Head over to Section 4, “Features” now!
4. Features
Command Format
-
Words in
UPPER_CASEare the parameters to be supplied by the user e.g. inmodule m/MODULE_CODE,MODULE_CODEis a parameter which can be used asmodule m/CS2103. -
Items in square brackets are optional e.g
deadline n/NAME [r/REPEAT]can be used asdeadline n/Work r/YESor asdeadline n/Work. -
Parameters can be in any order e.g. if the command specifies
m/MODULE_CODE n/NAME,n/NAME m/MODULE_CODEis also acceptable.
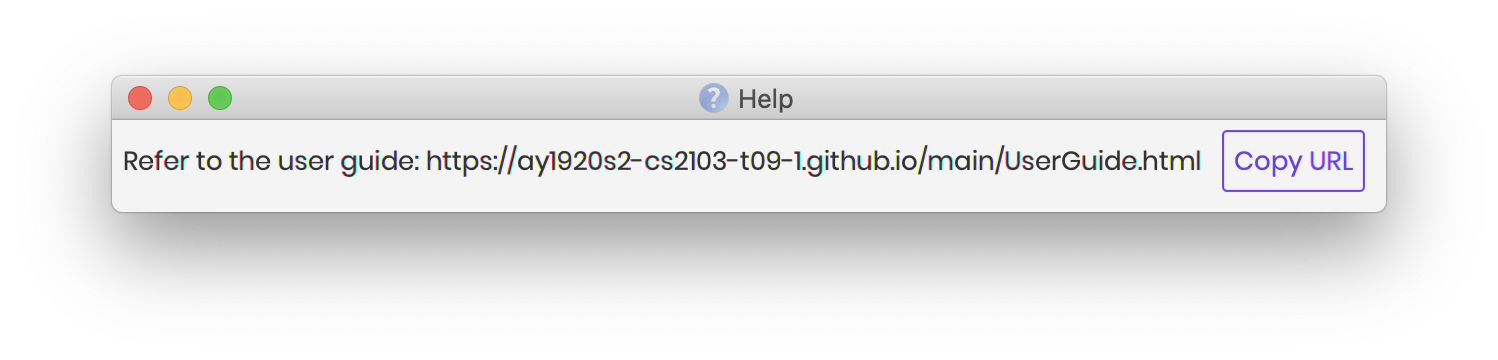
4.1. Viewing help : help
Opens the pop-up help window with the link to this user guide.
Format: help
4.2. Adding a module: module (Multistep)
Adds a module for AY 19/20 Sem 2 to Modulo.
Format: module m/MODULE_CODE
Example:
-
module m/cs2100
This command will kickstart the autopopulation of module events.
Refer to our tutorial for more information!
You will be prompted to enter the slot numbers for all events under this module, e.g. tutorial slot 2, lecture slot 1, lab slot 13, etc.
Example of prompts by Modulo:
-
Enter slot for CS2100 Lab: -
Enter slot for LAJ1201 Tutorial Type Two:

4.3. Adding an event: event
Adds a custom event to a module.
This is perhaps the lengthiest command in Modulo.
Events refer to Tutorials, Lectures, Examinations, etc.
Note: You’re only able to add by slot when going through the multistep module command!
The event command requires manual entry.
Format: event m/MODULE_CODE n/EVENT_NAME s/START_DATETIME e/END_DATE v/VENUE [r/REPEAT] [f/FREQUENCY]
[until/REPEAT_STOP_DATE]
Limitations:
-
You cannot add events of the same name under a single module.
-
The datetime format recognised is YYYY-MM-DD HH:MM.
-
The date format is YYYY-MM-DD.
-
The start and end times of the event must be within AY 19/20 Sem 2, and the end time must be after the start time.
-
Your event cannot be longer than a day.
-
By default, the event will not repeat.
-
The default repeat frequency (in weeks) is 1 week.
-
If no repeat end datetime is specified, the event will repeat until the end of the semester (Week 16).
Example:
-
event m/CS2103 n/Make Up Tutorial s/2020-01-30 10:00 e/2020-01-30 11:00 v/COM1-B103 r/YES until/2020-05-08
4.3.1. Pro-tip (GUI-dependent)
If you’re already viewing a module (i.e. focused on a module), you can actually drop the m/MODULE_CODE!
4.4. Adding a deadline: deadline
Adds a deadline to an event. This deadline will be due when the event starts.
Format: deadline m/MODULE_CODE e/EVENT_NAME n/DEADLINE_NAME [r/REPEAT]
Limitations:
-
Deadlines are due when the event starts!
-
Repeat refers to the creation of the same deadline for events of the same type, occuring after the specified event.
-
By default, the deadline will not repeat.
-
The deadline repeat function only works for events of recognised types, e.g.
Tutorial,Lectureetc. This is to prevent the creation of irrelevant deadlines for unrecognised types of events.
4.4.1. Pro-tip (GUI-dependent)
If you’re already viewing an event (i.e. focused on an event), you can actually drop the m/MODULE_CODE
AND the e/EVENT_NAME!
4.5. Listing events or modules on the left: list
Note: Given that this command changes the list being listed on the left, it is largely GUI-dependent.
Shows a list of all events or modules in the left panel of Modulo.
This helps you to toggle between the two lists.
You can always check which list you’re viewing by looking at the menu bar above:
Format: list events OR list modules
Shorthands:
-
list event/list e
Same behaviour aslist events- lists all the events on the left display panel. -
list module/list m
Same behaviour aslist modules- lists all the modules on the left display panel.
4.6. Viewing module or event details: view
Note: Given that this command changes the item being focused on on the right, it is largely GUI-dependent.
Lets user view the details for a module or event on the right panel based on its index on the left panel.
This index is based on the current list being listed.
Format: view INDEX
Example:
-
view 3

4.7. Finishing a deadline: done
Toggles the completion status of a deadline.
If the deadline was incomplete, it would be completed, and vice versa.
Format: done index m/MODULE_CODE e/EVENT_NAME
The index in question here is the index of the deadline.
This may be a bit tough to know without first using the
view command.
Example:
-
done 1 m/CS2103 e/Tutorial 13
All deadlines completed.
At least one incomplete deadline.
4.7.1. Pro-tip (GUI-dependent)
If you’re already viewing an event (i.e. focused on an event), you can actually drop the m/MODULE_CODE
AND the e/EVENT_NAME!
Known Bug: When you complete a deadline, the list on the left side will refresh, and the item that was selected will unselect itself.
4.8. Finding events or modules using keywords: find
Note: Given that this command searches through the list being listed on the left, it is largely GUI-dependent.
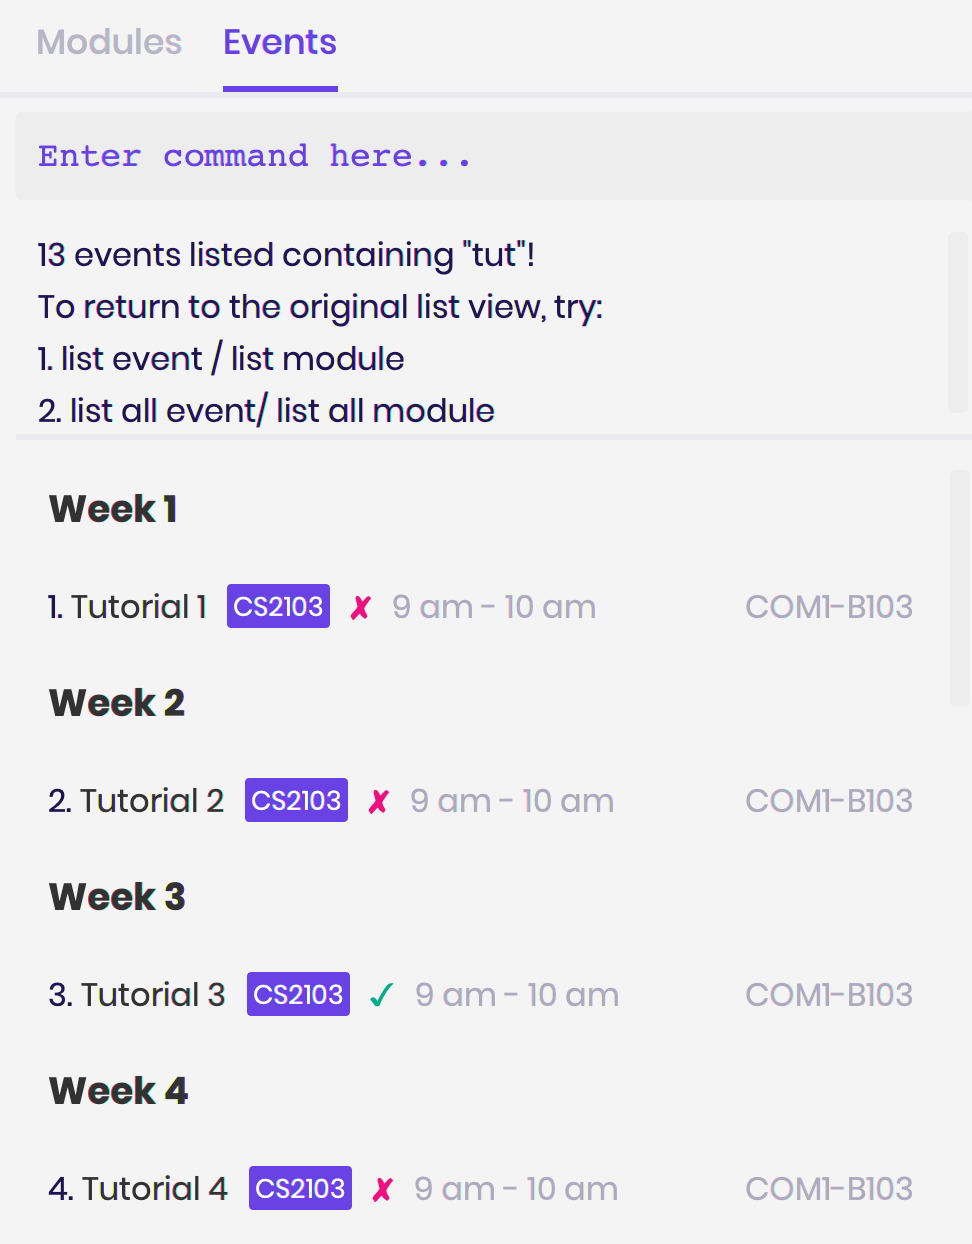
Allows the user to search through the current list for items which match any of the given keywords.
Format: find SEARCH_TERM
Things to note:
-
The search is case insensitive. e.g
find tutorialwill produce all events that match Tutorial. -
Names containing part of the searched words will be matched e.g.
find tutwill match Tutorial 4. -
Modules will be searched according to their Module Code, Name as well as Academic Year.
-
Events will be searched according to their Module Code and Name.
-
After finding, to get back the whole list again, users can simply enter
list eventsorlist modules.
4.8.1. Pro-tip
The find command allows the user to continually filter their list of searches.
For example, while viewing the list of events, entering find cs2103 and then find tutorial right after will allow the user to view CS2103 tutorials.
4.9. Deleting a module/event/deadline: delete
Note: Given that this command deletes based on the list being listed, it is largely GUI-dependent.
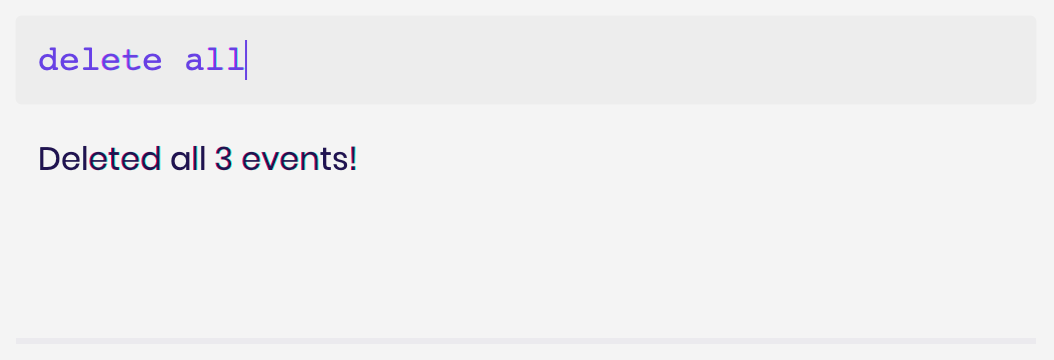
Deletes a module, event, or deadline by its index, a search term, or delete all.
4.9.1. Deleting Modules and Events
Format: delete INDEX OR delete SEARCH_TERM OR delete all
Things to note:
-
Deleting a module will delete all its associated events.
-
Deleting an event with delete all its associated deadlines.
-
You can delete a module or an event based on its displayed index on the left panel or using a search term. You can also delete all modules or events.
4.9.2. Deleting Deadlines
Note: You NEED to have the event you want focused to do this. We will work on removing the need for this in future versions.
Format: delete d/INDEX OR delete d/all
Things to note:
-
You can delete an event’s deadline using the deadline’s index.
-
You can also delete all deadlines of that event.
-
This event needs to be currently viewed on the right panel.
4.10. Exporting Events and Deadlines: export
Exports all events and deadlines into a .ics file.
File will be named modulo.ics inside the export directory.
Format: export [d/TARGET_DIRECTORY]
Things to note:
-
If no directory is provided, by default Modulo will deposit the
.icsfile into thedatafolder. -
.icsfile will be generated with the Singapore (Asia) timezone. -
Event entity will be converted as VEVENT.
-
Deadline entity will be exported as VTODO.
-
However, as certain common calendar applications (e.g. Google Calendars, Microsoft Outlook) do not parse VTODO, summarised deadlines are also displayed under the event’s description.
Examples:
-
export -
export d/data/
4.11. Clearing all data: clear
Clears all data from Modulo and starts the app from a clean slate.
Note: This command cannot be undone! So do use it wisely.
Format: clear
4.12. Editing added Events and Deadlines: [coming in v2.0]
This is an upcoming feature! Do keep an eye out!
4.13. Importing a NUSMods Calendar: [coming in v2.0]
This is an upcoming feature! Do keep an eye out!
5. UI
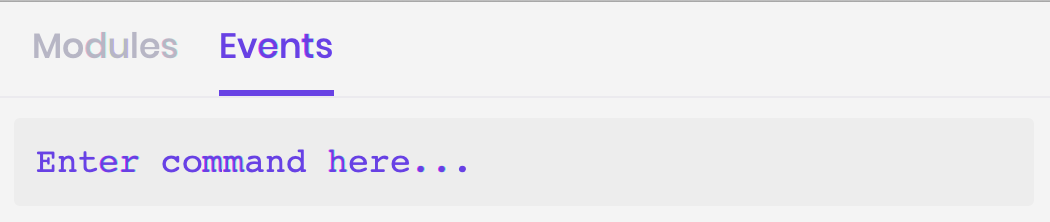
5.1. Menu Bar Buttons
These buttons perform the equivalent of list modules and list events respectively.
Just click them!
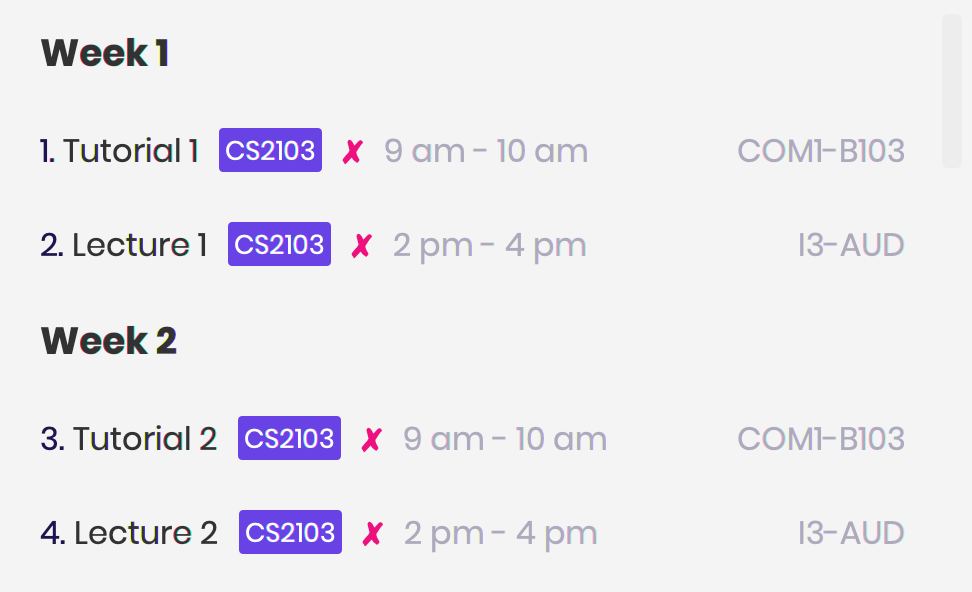
5.2. Module and Event List
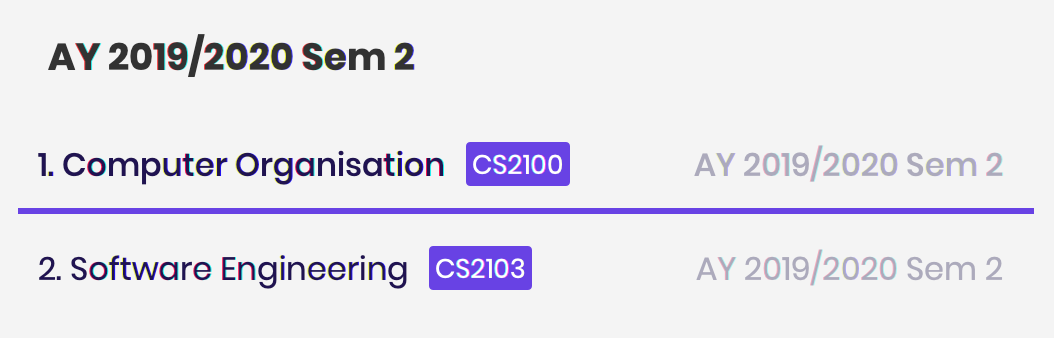
Click on any of these list items to view them on the right panel.
They perform the equivalent of view INDEX.
Modules are separated accordingly into their academic years and semesters, and events are separated based on their dates.
5.3. Module Details
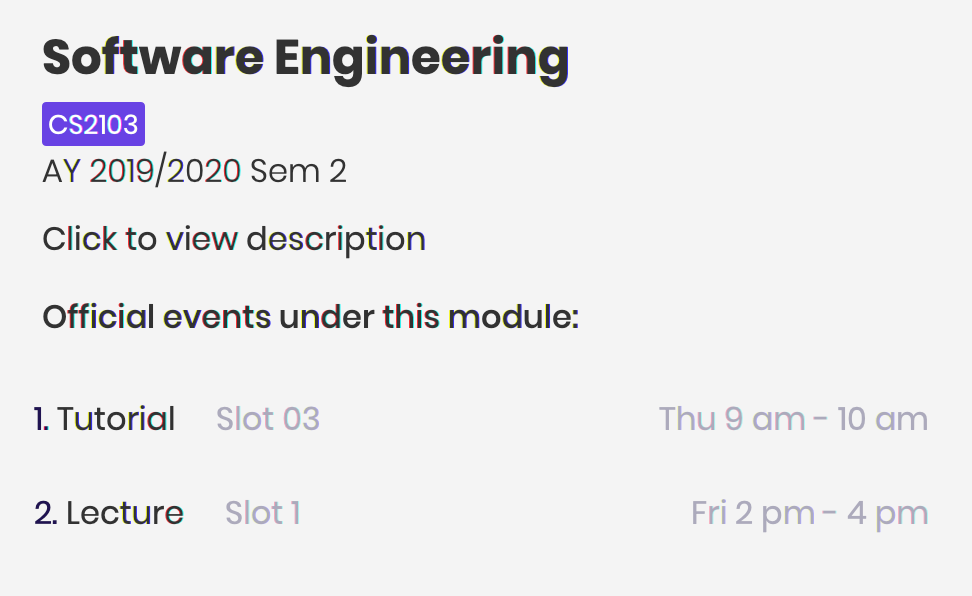
The right panel displays the details of the module. Only official events added using slots will be listed here.
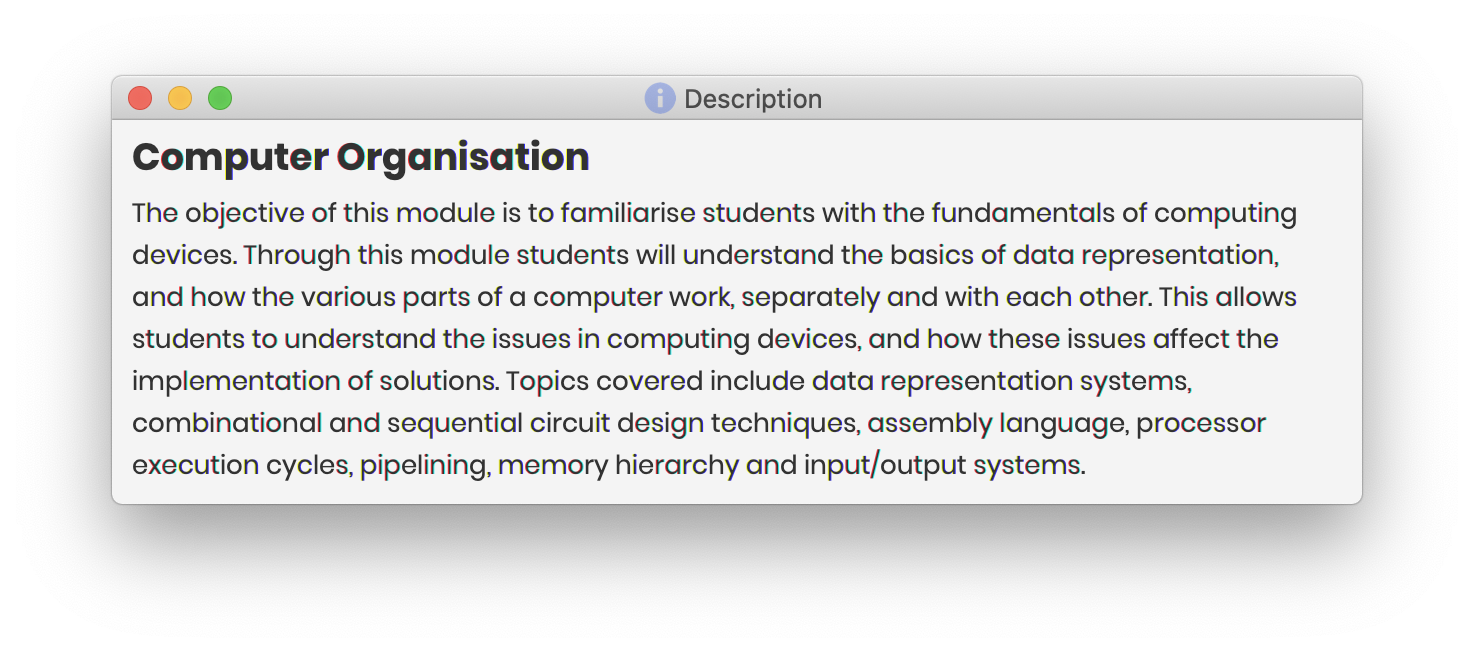
You can click "Click to view description" to open the Description Window.
Clicking any of the events listed below will also bring you to the first event of that type and slot.
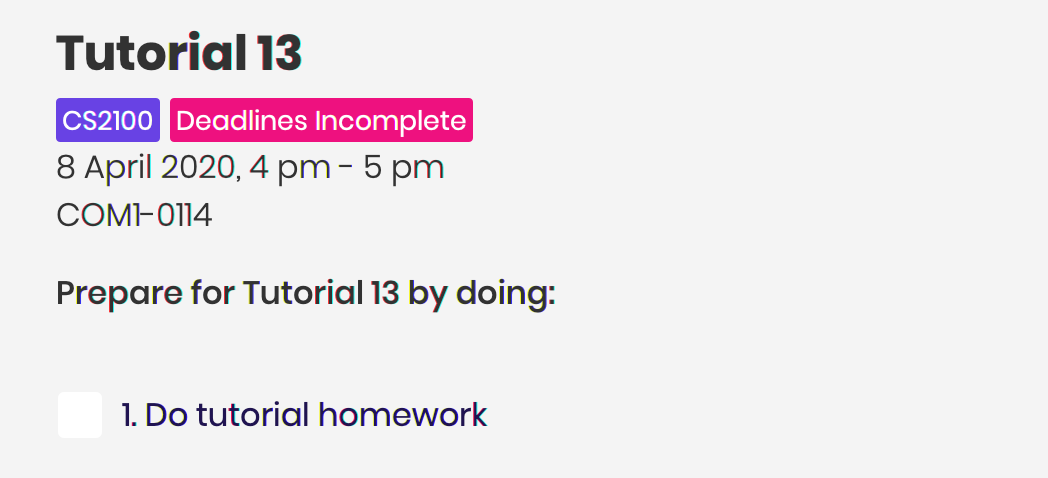
5.5. Event Details
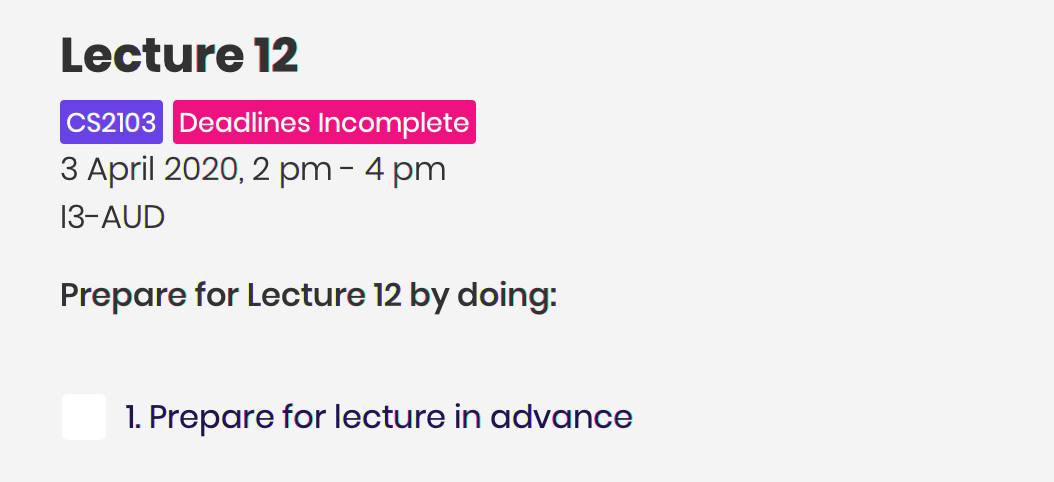
The right panel displays the details of the event.
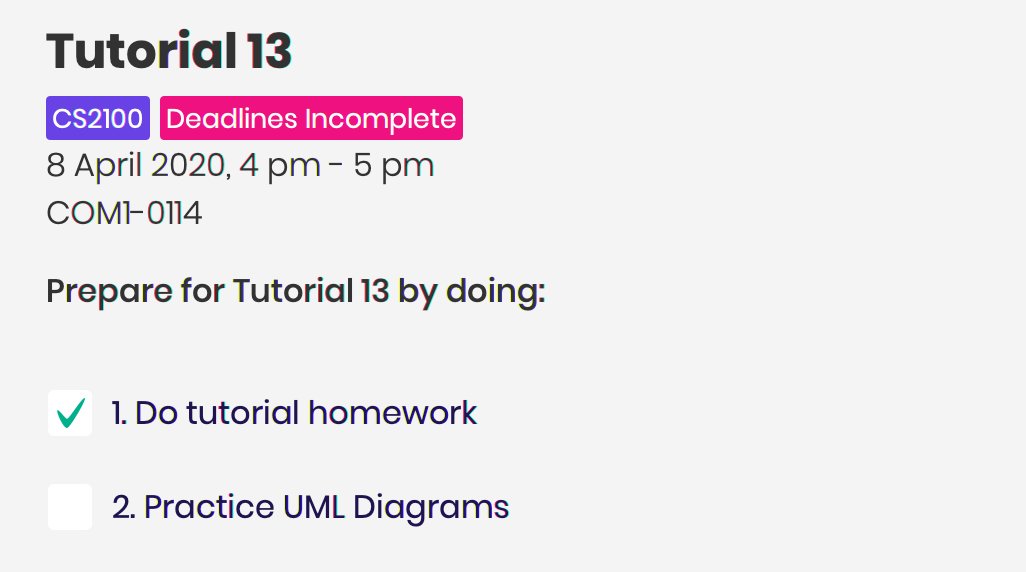
You can check any of the deadlines to mark them as complete or incomplete, performing the equivalent of done INDEX.
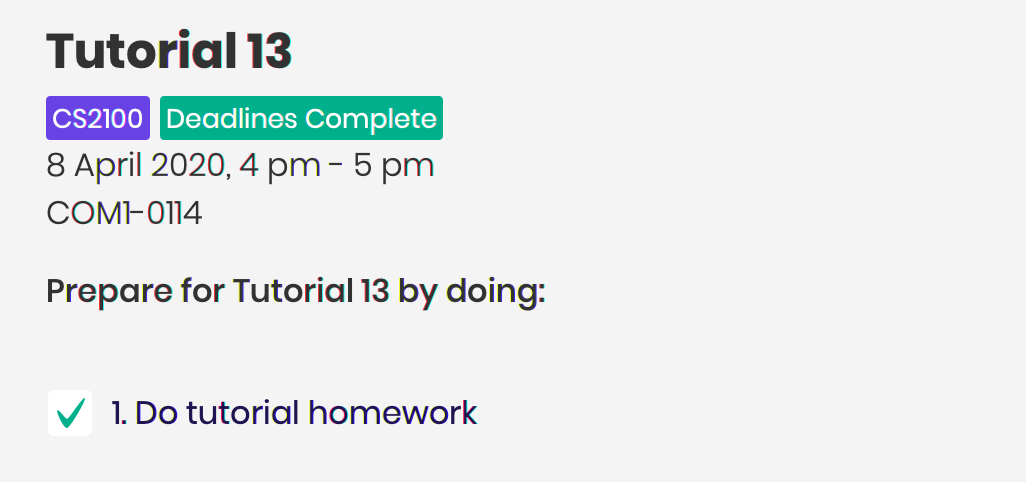
The second tag / label indicates whether all deadlines have been completed.
5.6. Status Bar Footer

This status bar displays where your data is being saved at.
You can head over to that folder to find the .json file for your usage.
Your exported modulo.ics will also be found in the same directory, unless otherwise specified when exporting.
6. FAQ
Q: How do I transfer my data to another Computer?
A: Install the app in the other computer and overwrite the empty data file it creates with the file that contains the data of your previous Modulo.
Q: My tutorial starts in Week 3. Why does it show up from Week 1 on Modulo?
A: Modulo uses NUS module data to do the event autopopulation.
Unfortunately, there are discrepancies between the data they have and what actually happens on the ground.
To overcome this, you can either manually create a repeating event, or delete the first two occurrences of the event.
Q: Does Modulo work for other semesters?
A: For now, Modulo is made for students taking modules this Academic Year AY2019/2020, Semester 2! Upon the new Academic Year, Modulo will be updated!
Stay Tuned!
Q: Does Modulo only work for NUS students?
A: Unfortunately for now, Modulo is only catered to NUS students.
For other universities, feel free to reach out to our team to discuss a possible collaboration!
7. Appendix
7.1. Official Event Types
Recognised official event types are:
-
Tutorial
-
Lecture
-
Sectional
-
Seminar
-
Recitation
-
Laboratory
-
Workshop
-
Packaged Tutorial
-
Packaged Lecture
-
Tutorial Type Two
-
Design Lecture